Mittwoch, 31. Dezember 2025
Home
Home / aktuell
Übungsplan
Kalender
Jugendfeuerwehr
Lehrgänge
Fortbildung
Unterricht
Einsätze
Einsatzübersicht
Galerie
Übungsbilder
Veranstaltungen
Einsatzbilder
Vorstandschaft
Feuerwehr
Historisch
Fahrzeug
Ausrüstung
Aktive Mannschaft
Infos / kontakt
Kontakte
Notruf / Hilfe
Rauchmelder
Feuerlöscher
Nützliche Tipps
Links
Impressum
Aktuelle Seite:
Startseite
Galerie
Übungsbilder
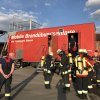
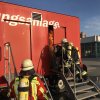
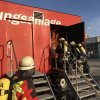
Brandcontainer
2
2
2
Reihenfolge
Sortierung aufsteigend
Sortierung absteigend
Titel aufsteigend
Titel absteigend
Datum aufsteigend
Datum absteigend
Bewertungsanzahl aufsteigend
Bewertungsanzahl absteigend
Bewertung aufsteigend
Bewertung absteigend
Zugriffe aufsteigend
Zugriffe absteigend
Nummer anzeigen
5
10
15
20
50
Alle
Powered by
Phoca Gallery